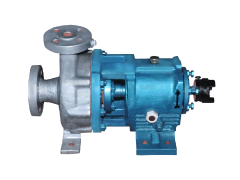


How to Choose the Right Centrifugal Pump for Oil Transfer
May 8, 2025
Complete Guide to Polypropylene Centrifugal Pumps: Selection, Installation & Maintenance
June 16, 2025
Introduction: The Importance of Proper Centrifugal Pump Installation
Centrifugal pumps are integral to various industrial processes, facilitating the efficient movement of fluids across systems. However, the performance and longevity of these pumps are heavily influenced by the quality of their installation. An improperly installed pump can lead to issues such as reduced efficiency, increased wear and tear, and potential system failures.
Centrifugal pumps are essential in many industries, but poor installation can lead to inefficiency, damage, and failure. This guide walks you through each step to ensure your pump runs smoothly and lasts longer.
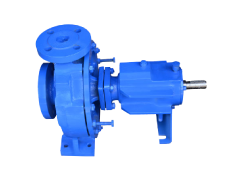
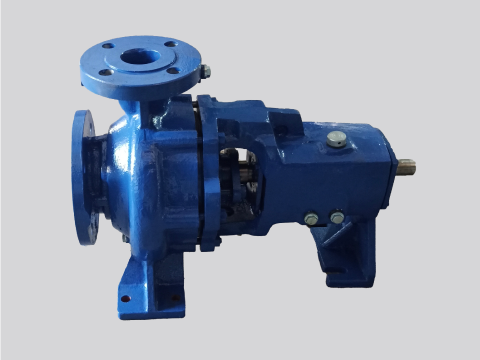
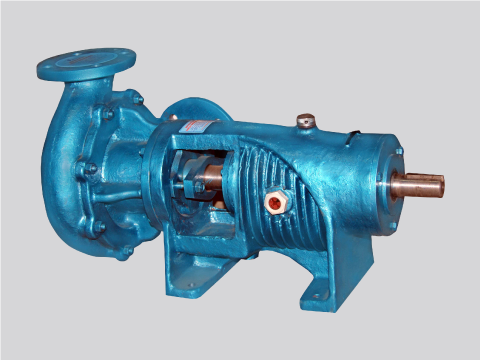
Understanding Centrifugal Pumps
Before diving into the installation process, it's essential to grasp the fundamental components and working principles of centrifugal pumps:
- Impeller: A spinning part that pushes the liquid by creating speed and flow.
- Casing: The outer cover that guides the liquid and protects the inner parts.
- Shaft: A rod that joins the motor and impeller to transfer motion.
- Bearings: Small parts that help the shaft spin smoothly without damage.
- Mechanical Seal: Stops the liquid from leaking out where the shaft comes through the casing.
- Motor: Powers the pump by making the impeller spin and move the liquid.
Understanding these components helps in recognizing the importance of each step in the installation process.
Common Applications of Centrifugal Pumps
Centrifugal pumps are utilized across various industries, including:
- Water Treatment: High-volume water transfer.
- Chemical Processing: Handling corrosive fluids.
- Oil & Gas: Moving crude oil and refined fuels.
- Food & Beverage: Pumping liquids like juice or milk.
- Pharmaceuticals: Transporting sterile fluids.
Each application may have specific requirements influencing the installation approach.
Major Considerations Before Installation
Before starting installation:
- Match Pump to System: Ensure specifications meet system needs.
- Review Layout: Identify any piping or space constraints.
- Follow Manufacturer's Guide: Always follow the specific instructions provided.
Pre-Installation Checklist for Centrifugal Pumps
Before beginning the installation process, several important factors need to be addressed to ensure a successful pump setup.
Site Requirements for Optimal Pump Performance
The installation site must have adequate space around the pump unit to allow for maintenance activities and proper ventilation. Aim for at least 3 feet of clearance on all sides for access. The location should be protected from extreme weather conditions if outdoors, and temperature-controlled if handling sensitive fluids.
Consider positioning the pump below the liquid supply level, when possible, as this creates a naturally flooded suction—ideal for most centrifugal pumps. This positioning helps prevent cavitation issues and improves overall pump efficiency.
Essential Tools and Equipment for Pump Installation
Having the right tools ready before you begin saves time and ensures proper installation:
- Wrenches and spanners (various sizes)
- Spirit level for accurate leveling
- Dial indicator with magnetic base for alignment
- Torque wrench for proper bolt tightening
- Grouting materials (non-shrink grout)
- Foundation bolts, nuts, and washers
- Gaskets and sealing compounds
- Shims of various thicknesses
- Safety equipment (gloves, safety glasses, hard hat)
For precision installations, consider using a laser alignment system, which significantly improves accuracy and extends equipment life.
Safety Measures Before Starting Installation
Always prioritize safety when installing centrifugal pumps. Disconnect and lock out all power sources following proper lockout/tagout procedures before beginning work. For existing systems, release pressure and drain fluids from connected piping.
Wear appropriate personal protective equipment including safety glasses, gloves, and proper footwear. When lifting heavy components, use proper lifting equipment rated for the load—never attempt to lift pumps or motors manually.
Why Proper Installation Matters for Centrifugal Pumps
Understanding the importance of correct installation helps motivate attention to detail throughout the process.
Performance Benefits of Correct Pump Setup
Proper installation allows your centrifugal pump to operate at or near its best efficiency point (BEP). When installed correctly, the pump delivers the designed flow rate and pressure while consuming the expected amount of energy.
Correct alignment between pump and motor ensures efficient energy transfer with minimal losses due to vibration or friction. Proper piping configuration reduces turbulence and friction losses, allowing the pump to work less hard to move the same amount of fluid.
Cost Savings Through Proper Installation
The financial benefits of proper pump installation impact both immediate and long-term costs:
- Energy consumption represents a significant portion of a pump's lifetime cost—often exceeding the purchase price. A properly installed pump operates more efficiently, consuming less power.
- Maintenance costs decrease dramatically with correct installation. When pumps are properly aligned and mounted, component wear is minimized, extending the life of expensive parts like mechanical seals and bearings.
- Unplanned downtime is perhaps the most expensive consequence of poor installation. Proper installation minimizes the risk of unexpected failures, keeping operations running smoothly.
Safety Advantages of Expert Installation
Correctly installed pumps operate with less vibration and noise, creating a safer working environment. Proper mounting and alignment minimize risks of pipe breaks, fluid leaks, or catastrophic failures that could endanger workers.
vFor systems handling hazardous fluids, proper seal installation and piping connections prevent leaks that could expose workers to dangerous substances. Additionally, correctly sized and installed safety devices function as intended when needed.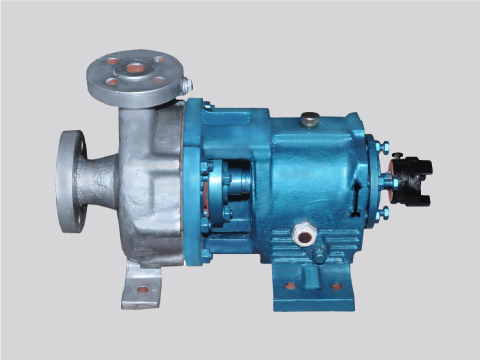
Centrifugal Pump Installation Process
Following a systematic approach ensures no critical steps are missed and results in a reliable, efficient system.
Step 1: Preparing the Foundation for Your Pump
Selecting the Right Location
Choose a location that minimizes pipe runs while ensuring accessibility for maintenance. Consider the required Net Positive Suction Head Available (NPSHA) when positioning your pump. Avoid areas with excessive dust, corrosive atmospheres, or extreme temperatures unless your pump is specifically designed for such conditions.
Creating a Sturdy Foundation
A proper concrete foundation is essential for stable pump operation and vibration control. The foundation should:
- Extend at least 6 inches beyond the base plate on all sides
- Be constructed of reinforced concrete (minimum 3,000 psi strength)
- Have enough mass—typically 3 times the weight of the pump assembly
- Include properly positioned foundation bolts set in sleeves for adjustment
- Be fully cured before mounting the pump (typically 7-14 days)
Step 2: Positioning and Leveling the Base Plate
The base plate provides a stable platform for both pump and motor. Clean the foundation surface thoroughly before placing the base plate on the foundation bolts. Install washers and nuts, but don't fully tighten them yet.
Level the base plate using shims or wedges placed near foundation bolts and support points. Use a precision spirit level to check in both longitudinal and transverse directions. The levelness tolerance should be within 0.002 inches per foot of base plate length. Once level, tighten the foundation bolts just enough to hold position.
Step 3: Grouting the Base Plate
Grouting fills the space between the base plate and foundation, providing stability and dampening vibrations:
- Build a dam around the base plate perimeter, extending about 1 inch above the base plate bottom
- Clean the area under the base plate thoroughly
- Mix non-shrinking grout according to manufacturer instructions
- Pour grout through designated holes or from one side
- Ensure complete filling without air pockets
- Allow the grout to cure according to specifications (typically 24-48 hours)
- Keep the grout moist during curing to prevent cracking
- After curing, tighten foundation bolts to recommended torque values
Step 4: Installing the Pump and Motor Units
With a properly grouted base plate, you can now install the pump and motor:
- Clean all mounting surfaces thoroughly
- Place the pump on the base plate, aligning with mounting holes
- Install mounting bolts loosely
- Similarly place the motor in position with loose mounting bolts
- Check both shafts for straightness before proceeding
Don't tighten the mounting bolts fully until after alignment is complete.
Step 5: Pump and Motor Alignment Procedure
Precise motor-pump alignment prevents vibration, bearing failure, and energy loss. Use a laser or dial gauge and recheck after final tightening.
Begin with rough alignment using a straightedge across coupling halves at multiple positions. For precision alignment, use dial indicators to measure both parallel and angular misalignment while rotating the shaft. Make adjustments by adding or removing shims under the motor feet until readings are within tolerance:
- 0.002-0.004 inches for parallel alignment
- 0.0005 inches per inch of coupling diameter for angular alignment
For the most accurate results, consider using laser alignment tools. After achieving proper alignment, tighten all mounting bolts to specified torque values, then perform one final alignment check.
Step 6: Connecting Pump Piping Correctly
Proper piping installation prevents stress on the pump casing and maintains alignment. The golden rule is that pipes must align naturally with pump flanges without forcing—any stress will distort the pump casing, potentially causing internal rubbing and premature failure.
For suction piping:
- Keep lines short and direct
- Use pipe diameter equal to or larger than the pump inlet
- Include a straight pipe section (5-10 pipe diameters long) before the inlet
- Install a suction strainer if needed, sized to prevent excessive pressure drop
On the discharge side, install a check valve and isolation valve. Support all piping independently from the pump using proper pipe hangers or supports. Consider installing flexible connectors on both suction and discharge sides to isolate vibration.
After completing piping connections, recheck the pump-to-motor alignment, as piping forces can shift the pump position.
Step 7: Installing Mechanical Seals and Packing
Mechanical seals prevent leakage where the shaft enters the pump casing. Clean the seal chamber and shaft thoroughly before installation. Inspect the shaft surface—it must be smooth and free from damage that could score seal faces.
Lubricate the shaft and elastomeric parts with compatible lubricant, then install the seal according to manufacturer instructions. For pumps using packing instead of mechanical seals, install packing rings one at a time, staggering the joints 90-120 degrees apart.
Step 8: Electrical Connections for Safe Operation
Before making connections, verify that power supply matches motor requirements for voltage, phase, and frequency. Connect the motor according to the wiring diagram typically found on the nameplate or terminal box.
Install appropriate motor protection devices, including overload protection calibrated to the motor's full load current. Before coupling the motor to the pump, check rotation by briefly energizing it—incorrect rotation can damage components immediately.
Ensure all electrical connections are secure and properly insulated and comply with relevant electrical codes and standards.
Post-Installation Procedures for Centrifugal Pumps
After completing physical installation, several critical procedures ensure your pump starts correctly and operates reliably.
Initial Startup Checklist and Testing Guide
Before applying power, perform these critical checks:
- Verify all bolts are tightened to specification
- Confirm proper alignment once more
- Rotate the shaft by hand to ensure free movement
- Check that guards and safety devices are in place
- Ensure valves are in correct position (typically suction valve open, discharge valve closed)
- Prime the pump if required
For startup:
- Fully open the suction valve
- Close or partially close the discharge valve to reduce startup load
- Start the motor and observe for unusual noise or vibration
- Once at operating speed, slowly open the discharge valve
- Monitor pressure, flow rate, motor amperage, and bearing temperatures
During the first few hours, check the pump frequently for any signs of problems.
Troubleshooting Common Centrifugal Pump Installation Issues
Even with careful installation, you might encounter some issues. Here's help for common problems:
| Problem | Possible Causes | Solution |
|---|---|---|
| Excessive vibration | Misalignment, loose foundation bolts, pipe strain | Recheck alignment, tighten bolts, verify piping is properly supported |
| Insufficient flow | Air in system, clogged strainer, incorrect rotation | Vent system, clean strainer, check rotation |
| Overheating bearings | Misalignment, improper lubrication, excessive load | Realign pump, check lubrication, verify operating conditions |
| Seal leakage | Improper installation, misalignment, incorrect flush plan | Check seal installation, realign pump, verify flush system |
| Motor overload | Operating beyond design point, mechanical issues | Check system curve, inspect for binding or rubbing |
Do's and Don'ts for Successful Centrifugal Pump Installation: Expert Tips
| Do | Don't |
|---|---|
|
|
|
|
|
|
|
|
|
|
|
|
|
|
|
|
|
|
|
|
Need help choosing the right oil pump?
Professional Pump Installation Services
While many maintenance teams can successfully install centrifugal pumps, professional services offer advantages for critical applications.
Why Choose Professional Installers for Industrial Pumps
Professional installers bring specialized knowledge and experience that can be valuable for challenging installations. They're equipped with specialized tools like laser alignment systems and precision measuring equipment that might be cost-prohibitive for occasional use.
Expert installation often means quicker completion with fewer complications, minimizing production downtime. Many professional installers offer warranties on their work, providing additional protection beyond equipment manufacturer guarantees.
Jay Khodiyar: End-to-End Installation Support
At Jay Khodiyar, we complement our high-quality pump manufacturing with comprehensive installation support. Our teams bring over 20 years of industry experience to every project, ensuring your centrifugal pump is installed correctly the first time.
Our installation services include:
- Comprehensive site assessment and preparation
- Foundation design recommendations
- Professional installation using precision alignment technology
- Complete system integration and commissioning
- Operator training on proper operation and maintenance
- Detailed documentation of installation parameters
We stand behind our installations with responsive 24/7 customer support. For facilities with in-house capabilities, we offer installation supervision services where our experts guide your team through the process.
Conclusion: Ensuring Long-Term Centrifugal Pump Performance
Proper installation is key to maximizing the efficiency and lifespan of your centrifugal pump. By ensuring correct foundation setup, precise alignment, and proper piping, you’ll reduce maintenance costs, minimize energy consumption, and prevent costly downtime.
Regular checks, particularly for alignment, are crucial to maintain optimal performance. Always follow manufacturer guidelines and document the installation for future reference.
At Jay Khodiyar we offer expert installation services backed by over 20 years of experience. Contact us today for professional support to ensure your pump operates at its best, long-term.